Your Shop
The moment you define your first product using the Admin Control Panel, it is ready for sale on your shop. This chapter describes the features of your shop and tells you how to link to it from other web pages of yours or your affiliates.
Note: The screenshots below are from the Pro version of ezPayPal. In the standard version, the Pro features and options will not be presented.
Basic Shop
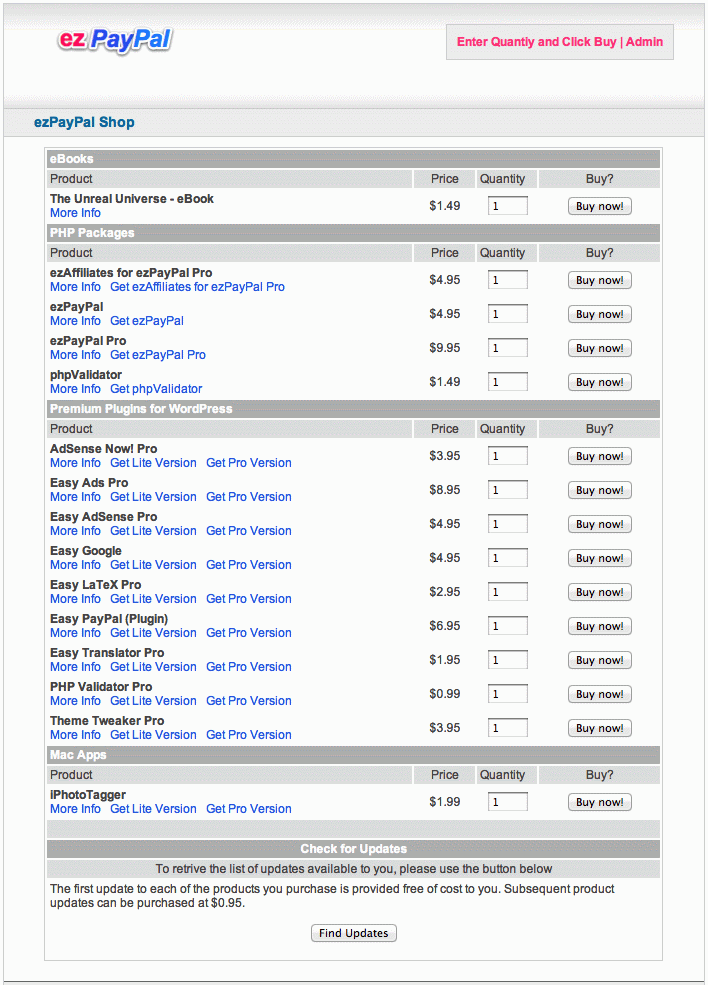
Your shop front generated by ezPayPal is shown in the image below. You can access it by browsing to your installation in the standalone versions. In the WordPress plugin versions, you will use the so-called shortcodes to access the shop front, as described below.

Quick Start with WordPress Plugin Version
It is easy to get started with ezPayPal in this WordPress plugin version. Please follow the steps below.
- If you see any warning or error messages above in red, please take care of it first.
- Please set up your PayPal Details above.
- Set up your General Options above
- Add a product by providing its Product Definition and uploading it.
Please do not use spaces or special characters in your Product Codes. Use only letters, digits and underscore.
Valid product codes:abc_2345, ITEM02, a789, xyzetc.
Invalid product codes:abc 123, ITEM:02, a-789, x+y$zetc.
Once a product is added to your repository, your e-shop is ready to
be displayed on your blog. The display is controlled using WordPress
Short Codes. In order to show the whole shop, create a new page or
post with the short code [ezshop]. This will present your
whole e-shop in a neat tabular form within the page or post.
Note that by default, a page (not a post) with the slug
ez-shop (or ez-shop-n, where n
is a number like 1, 2, 3 etc.) is created for you. Please do not
delete this page even if you create other e-shop pages. This page is
used as the IPN listener, which will receive the messages from
PayPal. This page also serves as your digital goods delivery
portal. In other words, if you delete this page, your ezPayPale-shop may not work at all.
Note also that you have to use pretty permalinks for the auto-generated shop front to work. Take a look at the URL address of the shop front (in the address bar on your web browser). Does it say something like http://your.blog/?p=123? If so, go to your WordPress dashboard, Settings -> Permalinks and select any setting other than the (ugly) default one.
Each product can be displayed as a "Buy Now" kind of link with the
short code [ezshop buy='product_code']Buy this product
now![/ezshop]. This will insert a link, which when clicked, will
take your reader to a PayPal page to buy the product.
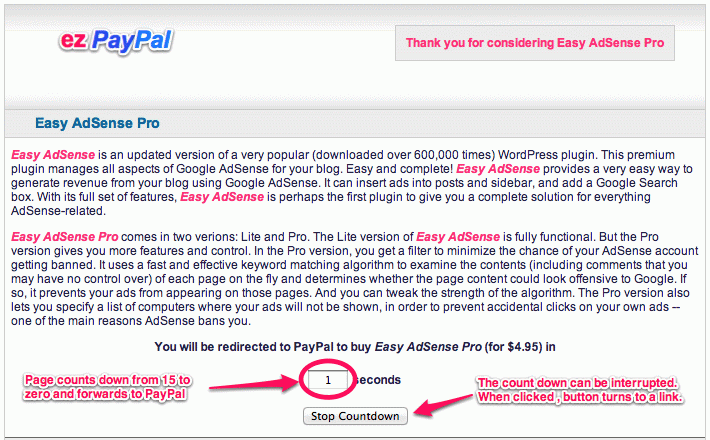
You can display your product links using [ezshop
show='product_code']View this product now![/ezshop]. It will
show page describing your product benefits, with a count-down timer
which will take your reader to PayPal in fifteen seconds.
In either buy=product_code or
show=product_code short codes, you can temporarily
suppress the link generation by specifying link='no',
(e.g., [ezshop show='product_code' link='no']View this product
now![/ezshop]). In this case, your whole e-shop will be
displayed as though you specified just [ezshop]. This
way, you can easily toggle between links and e-shop.
More Help
Help is always only a click or mouseover away. The full help on all the features of this plugin is included in your download. You can browse it or print it.Timely Help: On all setup, admin and Pro screens in ezPayPal, you can hover over theicon next to a feature or option to bring up a tooltip with detailed information about feature or option under consideration so that you don't have to refer to this manual every time you need help. ezPayPal will also validate your inputs and present warnings or error messages to guide you along.
To get the help page specific to an ezPayPal screen you are working with, look for the
Standalone Versions
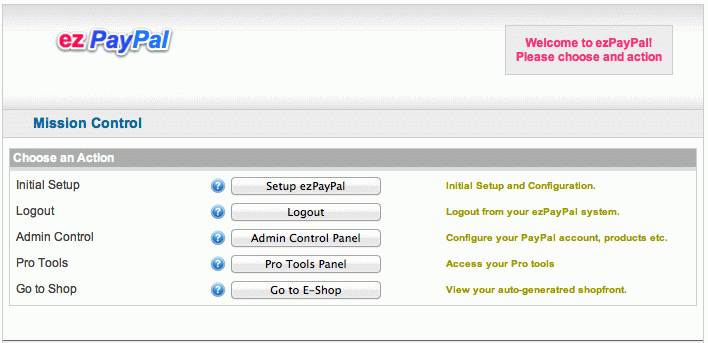
In standalone verions, both the Pro and the Lite (also called the Standard) editions, you can access your e-shop by simply browsing to the location where you installed ezPayPal. If you are logged in, you will see the following screen, giving you all the actions you can take as the administrator.
If you are not logged in to your ezPayPal, you will see your e-shop directly, which is the view your customers will be presented with. Note that even in this view, there is an easy access link to your admin page. Clicking on it, while not being logged in, will bring up a login request.
Buy and Show Links
Similar to the WordPress plugin version, the standalone version also
has the "Buy Now" and the count-down links. The format for a "Buy Now"
link would be http://yoursite/?buy=product_code, which takes
your customer directly to PayPal site. And
http://yoursite/?show=product_code takes them to a product
information page, which redirects to the PayPal payment page in 15
seconds. The customer can abort the count-down if they so choose.
Advanced Shop
The basic shop front generated by ezPayPal may not be fancy
enough for your purposes. It is possible to develop fancier presentations
of the shop front. In my own
e-shop, for instance, I make use of the product_meta
table to generate the following e-shop.
While this shop front may not look much fancier than the basic one,
note how products are grouped together based on their categories, and how
links to product description pages are presented. Furthermore, the product
information page (http://yoursite/?show=product_code) also
uses the information in the meta table as shown
below.
Customization
Setting up an advanced shop requires some PHP programming and database
manipulations. If you want to get it done by your in-house team, you can
start by making a copy of ez-shop.php, modifying the product
rendering part to make use your product_meta table, and then
point your website to use the modified version instead of the original
one.
I can help by providing the code that generates my own e-shop as an example. If you would like me to customize your shop front, get in touch with me through Support Portal.
Future Plans
I plan to make the customization process accessible to my end-users by
providing a template where they can define how their e-shop and product
information pages will look like. They will also have an interface where
they can add and modify their product_meta table.
Buyer Experience
To help your buyer during the purchase process, the following help text is shown to them when they click on the titlebar icon.
EZ Shop
Welcome to this e-Shop powered by ezPayPal. Buying a product featured here is as easy as entering the quantity desired and hitting the "Buy Now" button. On the next screen, we will redirect you to PayPal to complete the purchase. If the automatic redirect doesn't work, please hit the "Proceed to PayPal" button.
Once you complete the payment, PayPal will ask you to come back to this e-shop, if you so choose. Please choose to do so, and you will end up on a product delivery page where you can download your product. You will also receive an email with the download details.
Please note that the download liks are set to expire after a period of time. So please download your products promptly.
If you see you an option to update your product, this e-shop has implemented the advanced version tracking capabilities of ezPayPal, and you can claim your free product updates or purchase paid updates.
Enjoy the e-shop and your product purchase!
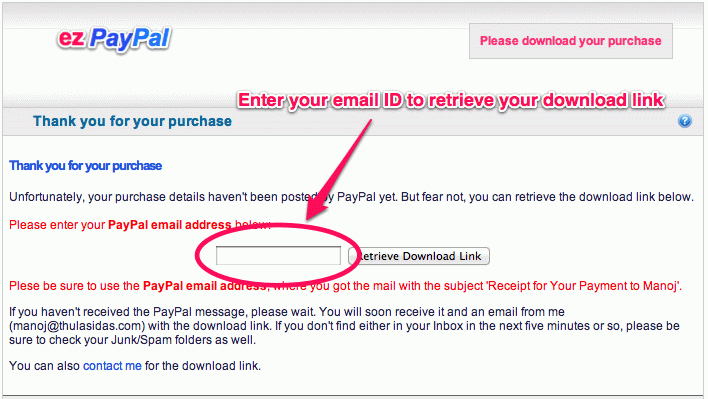
Similarly, during the product delivery stage, your buyer is guided along using the following help screen.Delivery of Your Purchase
Thank you for your purchase at this e-shop powered by ezPayPal. If the purchase has been successfully handled, you will see an obvious download link prominently displayed near the bottom of the page. Click on it to download your product.
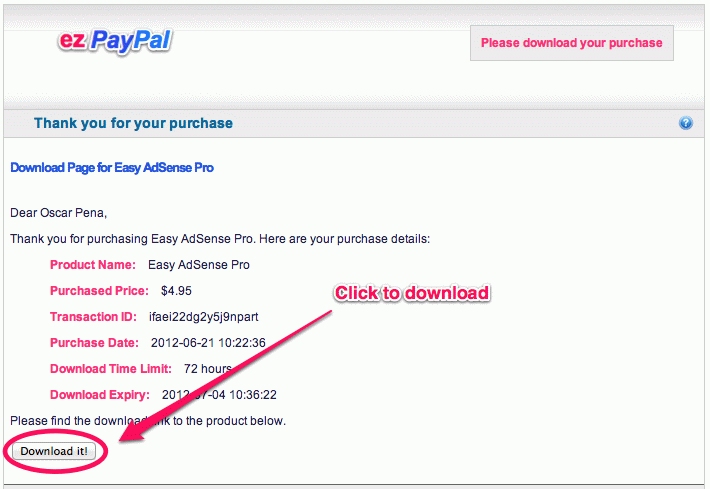
If there has been a delay in handling the purchase information, you can still retrieve your download link by entering your email ID (please be sure to use the email ID you used for purchasing the product) in the text box.